

taibeihacker
Moderator
一、系统环境配置
系统环境:centos7x64 ip地址:172.16.91.1301.设置静态IP地址
[root@localhost backlion]#vi /etc/sysconfig/network-scripts/ifcfg-*BOOTPROTO=static #dhcp改為static(修改)
ONBOOT=yes #開機啟用本配置,一般在最後一行(修改)
IPADDR=172.16.91.130 #靜態IP(增加)
GATEWAY=172.168.91.1 #默認網關,虛擬機安裝的話,通常是2,也就是VMnet8的網關設置(增加)
NETMASK=255.255.255.0 #子網掩碼(增加)
DNS1=172.16.95.70 #DNS 配置,虛擬機安裝的話,DNS就網關就行,多個DNS網址的話再增加(增加)
[root@localhost ~]# /etc/init.d/network restart
設置DNS:
Vim /etc/resolv.conf
nameserver=114.114.114.114
nameserver=8.8.8.8
2.设置主机名
[root@localhost network-scripts]# hostnamectl set-hostname selks-server.comvim /etc/hosts最後加上你的IP與主機名的綁定
127.0.0.1 localhost localhost.localdomain localhost4 localhost4.localdomain4
:1 localhost localhost.localdomain localhost6 localhost6.localdomain6
172.16.91.121 elk-server.com elk#其中最後是主機名的別名主機名:內網名字域名:公網名字主機名不能是localhost綁定主機名就相當於內網的dns,非常重要。
3.关闭防火墙
[root@selks-server ~]# cat/etc/selinux/config
# This file controls the state of
SELinux on the system.
# SELINUX=can take one of these
three values:
#enforcing - SELinux security
policy is enforced.
#permissive - SELinux prints
warnings instead of enforcing.
#disabled - No SELinux policy is
loaded.
SELINUX=disabled
# SELINUXTYPE=can take one of
three two values:
#targeted - Targeted processes
are protected,
#minimum - Modification of
targeted policy. Only selected processes are protected.
#mls - Multi Level Security
protection.
SELINUXTYPE=targeted
或者
[root@localhost ~]# sed -i
7s/enforcing/disabled//etc/selinux/config
關閉firewall:
[root@selks-server ~]# systemctl
stop firewalld.service #停止firewall
[root@selks-server ~]# systemctl disable firewalld.service #禁止firewall開機啟動
[root@localhost ~]# systemctl
list-unit-files |grep firewalld #查看是否隨機啟動firewall
4. 安装wget
[root@selks-server ~]# yum install wget –y5.更换yum源
更換成阿里雲源,更新系統、下載軟件速度快4[root@selks-server ~]#yum
install wget
[root@selks-server ~]# mv /etc/yum.repos.d/CentOS-Base.repo /etc/yum.repos.d/CentOS-Base.repo.backup
[root@selks-server ~]# wget -O
/etc/yum.repos.d/CentOS-Base.repo http://mirrors.aliyun.com/repo/Centos-7.repo
[root@selks-server ~]# yum clean all
[root@selks-server ~]# yum makecache
6.更新系统
[root@selks-server ~]# yum -yupdate
7.安装epel源
[root@selks-server rules]# yum -yinstall epel-release
8.时间同步
[root@localhost yum.repos.d]# yum-y install ntp ntpdate #安裝ntp時間同步相關軟件包
[root@localhost yum.repos.d]#cat /etc/ntp.conf #確認配置文件裡有下列的時間同步源
server 0.rhel.pool.ntp.org iburst
server 1.rhel.pool.ntp.org iburst
server 2.rhel.pool.ntp.org iburst
server 3.rhel.pool.ntp.org iburst
[root@localhost yum.repos.d]# systemctl enable ntpd #設置開機自動啟動ntpd
[root@localhost yum.repos.d]# systemctl
start ntpd #立即啟動ntpd服務
[root@localhost yum.repos.d]#
cp
/usr/share/zoneinfo/Asia/Shanghai /etc/localtime
[root@localhost yum.repos.d]#date#確認時間與現在時間一致
9.添加路由
用法:route add -net|-host DEST gw
NEXTHOP
route add -net 10.0.0.0/8 gw
192.168.10.1 #添加路由
route add default gw
192.168.10.1 #添加一條默認路由
永久添加/刪除關於某個網卡的路由:編輯/etc/network-scripts/route-INTERFACE_NAME
vim
/etc/network-scripts/route-eth0
ADDRESS0=222.16.60.148
NETMASK0=255.255.255.0
NEXTHOP0=222.16.60.254
ADDRESS1=222.16.60.214
NETMASK1=255.255.255.0
NEXTHOP1=222.16.60.254
二、安装Suricata
1.安装依赖包[root@selks-server ~]# yuminstall wget libpcap-devel libnet-devel pcre-devel gcc-c++ automake autoconf
libtool make libyaml-devel zlib-devel file-devel jansson-devel nss-devel
2.下载解压Suricata下載最新安裝包http://suricata-ids.org/download/(截至18年6月14日,最新版本為4.0.4)
[root@selks-server ~]# wget http://www.openinfosecfoundation.org/download/suricata-4.0.4.tar.gz
[root@selks-server ~]# tar zxvf
suricata-4.0.4.tar.gz
[root@selks-server ~]# cd
suricata-4.0.4
3.编译安装[root@selks-server ~]#./configure
make make install-full
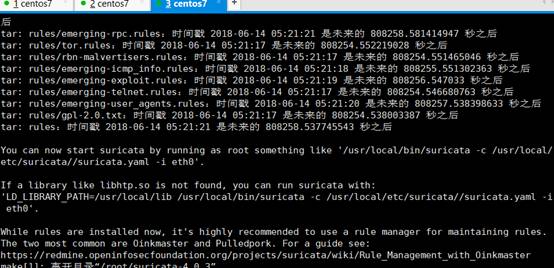
注意:
默認從http://rules.emergingthreats.net/社區下載可用的社區規則集快照,並且將其存儲在/usr/local/etc/suricata/rules目錄下。
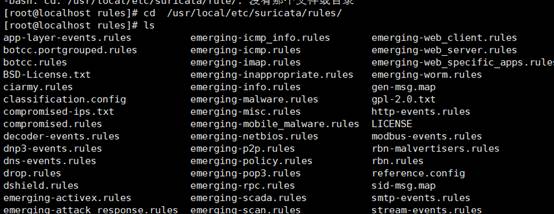
suricata配置文件路徑為:
/usr/local/etc/suricata/suricata.yaml
4.配置suricata請注意:不管使用哪個端口, Suricata都能自動檢測HTTP流量。所以,正確指定HTTP_PORTS變量並不是很重要。命令如下:
[root@selks-server ~]# vim /usr/local/etc/suricata/suricata.yaml
#Suricata 的配置文件默認在/etc/suricata/suricata.yaml,在啟動前我們需要先配置好一些重要的變量,其中變量分為兩組,一個是地址組(address-groups),另一個是端口組(port-groups)。示例配置文件如下
注意:如果HOME_NET設置了any,EXTERNAL_NET設置! HOME_NET的話會報錯,如果HOME_NET設置了內網地址,EXTERNAL_NET設置為! $HOME_NET的話,有些內網之間的告警就無法匹配到
address-groups: #配置地址組
HOME_NET:
'[192.168.0.0/16,10.0.0.0/8,172.16.0.0/12]' #指定Suricata 檢查的網絡
#HOME_NET:
'[192.168.0.0/16]'
#HOME_NET: '[10.0.0.0/8]'
#HOME_NET: '[172.16.0.0/12]'
#HOME_NET: 'any'
#EXTERNAL_NET: '!$HOME_NET'
EXTERNAL_NET: 'any' #設置出本地以外的其他網絡地址
HTTP_SERVERS: '$HOME_NET'
SMTP_SERVERS: '$HOME_NET'
SQL_SERVERS: '$HOME_NET'
DNS_SERVERS: '$HOME_NET'
TELNET_SERVERS: '$HOME_NET'
AIM_SERVERS: '$EXTERNAL_NET'
DNP3_SERVER: '$HOME_NET'
DNP3_CLIENT: '$HOME_NET'
MODBUS_CLIENT: '$HOME_NET'
MODBUS_SERVER: '$HOME_NET'
ENIP_CLIENT: '$HOME_NET'
ENIP_SERVER: '$HOME_NET'
port-groups:
HTTP_PORTS: '80' #來辨別不同服務所用到的端口號
SHELLCODE_PORTS: '!80'
ORACLE_PORTS: 1521
SSH_PORTS: 22
DNP3_PORTS: 20000
MODBUS_PORTS: 502
FILE_DATA_PORTS:
'[$HTTP_PORTS,110,143]'
FTP_PORTS: 21
##
Step 2: select the rules to enable or disable
##
default-rule-path:
/usr/local/etc/suricata/rules #設置默認的規則庫路徑地址
rule-files:
- botcc.rules
# - botcc.portgrouped.rules
- ciarmy.rules
- compromised.rules
- drop.rules
- dshield.rules
#
- emerging-activex.rules
- emerging-attack_response.rules
- emerging-chat.rules
- emerging-current_events.rules
- emerging-dns.rules
- emerging-dos.rules
- emerging-exploit.rules
- emerging-ftp.rules
#
- emerging-games.rules
#
- emerging-icmp_info.rules
#
- emerging-icmp.rules
- emerging-imap.rules
#
- emerging-inappropriate.rules
#
- emerging-info.rules
- emerging-malware.rules
- emerging-misc.rules
- emerging-mobile_malware.rules
- emerging-netbios.rules
- emerging-p2p.rules
- emerging-policy.rules
- emerging-pop3.rules
- emerging-rpc.rules
#
- emerging-scada.rules
#
- emerging-scada_special.rules
- emerging-scan.rules
#
- emerging-shellcode.rules
- emerging-smtp.rules
- emerging-snmp.rules
- emerging-sql.rules
- emerging-telnet.rules
- emerging-tftp.rules
- emerging-trojan.rules
- emerging-user_agents.rules
- emerging-voip.rules
- emerging-web_client.rules
- emerging-web_server.rules
#
- emerging-web_specific_apps.rules
- emerging-worm.rules
- tor.rules
#
- decoder-events.rules # available in suricata sources under rules dir
#
- stream-events.rules # available in
suricata sources under rules dir
- http-events.rules # available in suricata sources under rules
dir
- smtp-events.rules # available in suricata sources under rules
dir
- dns-events.rules # available in suricata sources under
rules dir
- tls-events.rules # available in suricata sources under
rules dir
#
- modbus-events.rules # available in
suricata sources under rules dir
#
- app-layer-events.rules # available in
suricata sources under rules dir
#
- dnp3-events.rules # available in
suricata sources under rules dir
#
- ntp-events.rules # available in
suricata sources under rules dir
classification-file:
/usr/local/etc/suricata/classification.config
reference-config-file:
/usr/local/etc/suricata/reference.config
threshold-file:
/usr/local/etc/suricata/threshold.config
##
## Step 3: select outputs to
enable
##
types:
- alert:
# payload: yes # enable dumping payload in Base64
payload-buffer-size: 6kb # max
size of payload buffer to output in eve-log paylaod大小限制
payload-printable: yes # enable dumping payload in printable
(lossy) format 記錄原始payload
# packet: yes # enable dumping of packet
(without stream segments)
# http-body: yes # enable dumping of http body in
Base64
http-body-printable: yes # enable dumping of
http body in printable format 記錄http 原始響
metadata: yes # add L7/applayer fields, flowbit
and other vars to the alert
# pattern matcher buffers and
scans as many packets as possible in parallel.max-pending-packets: 1024 #設置了suricata能夠同時處理的數據包的數量,最少為1,最大值取決於內存的大小,更大的內存可以設置更大的值並擁有更好的性能,默認值是1024
部分用於防禦利用操作系統網絡棧的自身行為來逃避檢測的一些知名攻擊手段(例如:TCP reassembly)。作為對策,通過針對目標操作系統而對檢測引擎算法進行微調,現代IDC 提供了“基於目標”的檢測手段。因此,如果你知道某台主機運行了什麼操作系統的話,將這個信息提供給Suricata 就可以大幅提高檢測的成功率。這就是host-os-policy 存在的意義。本例中,默認的IDC 策略是Linux 系統。如果針對某個IP 地址沒有指定操作系統信息,Suricata 會默認應用基於Linux 系統的檢測策略。如下,當捕獲到對192.168.122.0/28 和192.168.122.155通訊時,Suricata 就會應用基於Windows 系統的檢測策略。
host-os-policy:
# Make the default policy windows.
windows: [10.22.0.0/24]
bsd: []
bsd-right: []
old-linux: []
linux: [0.0.0.0/0,10.22.0.188]
old-solaris: []
solaris: []
hpux10: []
hpux11: []
irix: []
macos: []
vista: []
windows2k3: []
5.关闭网卡LGO/GRO功能(网卡名结合实际修改)[root@selks-server ~]# ethtool -K
ens32 gro off lro off
Cannot change
large-receive-offload(說明你的網卡不支持LRO/GRO功能,忽略即可)
6.查看所有可用的运行模式[root@selks-server ~]# /usr/local/bin/suricata
--list-runmodes